Clone. Don’t Copy: How to Save Your Assets

One more time for the people in the back: CLONE! Don’t Copy! Trust us, you can thank us later!
How are you transferring your footage from your camera to your drives? Do you plug the card into the reader, double click the icon on your desktop then just click, drag, and drop the folder onto a drive to copy your footage?
STOP

If you don’t listen to me, then at least listen to Elmo and Jack Black.
At some point there may come a time when the entire day’s worth of shooting exists on some small piece of silicon that fits in the palm of your hand. Think about that. The entire budget of your shoot, and all the work of the cast and crew, rest there in the palm of your hand. How you handle receiving that little piece of media and what you do with it has tremendous effect on you and those around you. If you screw up, the only solution would be to re-shoot. But I’ve seen times where that’s not even an option and shots were totally lost. I’ve seen it happen to even experienced data wranglers, DITs, and ACs, and you know what the common denominator always was? Not following protocol.
Let’s just talk about one aspect of that protocol, copying and backing up your media.
So many filmmakers just drag and drop their footage, never thinking anything of it. They don’t even consider the necessary protocol needed to correctly duplicate the footage to multiple drives and visually confirm that it’s the correct footage. They just drag and drop.
You need to verify the footage was transferred, and transferred perfectly.
To do that, you’ll need a program that runs a checksum verification. A Checksum serves the “purpose of detecting errors which may have been introduced during its transmission or storage” -that’s how Wikipedia puts it anyways. I’d say it “makes sure nothing got screwed up” – same difference! There are a few apps, plug-ins, and dedicated data management tools that employ a checksum and other tasks that help to manage your data. Adobe CC has Prelude, RedGiant has “OffLoad” and then there are ShotPut Pro and Silverstack which I see on set all the time, and while all of these tools work, they still cost money and are plugins, or independent apps, and there great, but I want to focus on one in particular, because I don’t want you to have any excuse not to follow the right protocol. That’s Blackmagic Design’s DaVinci Resolve clone tool. DaVinci Resolve is FREE.
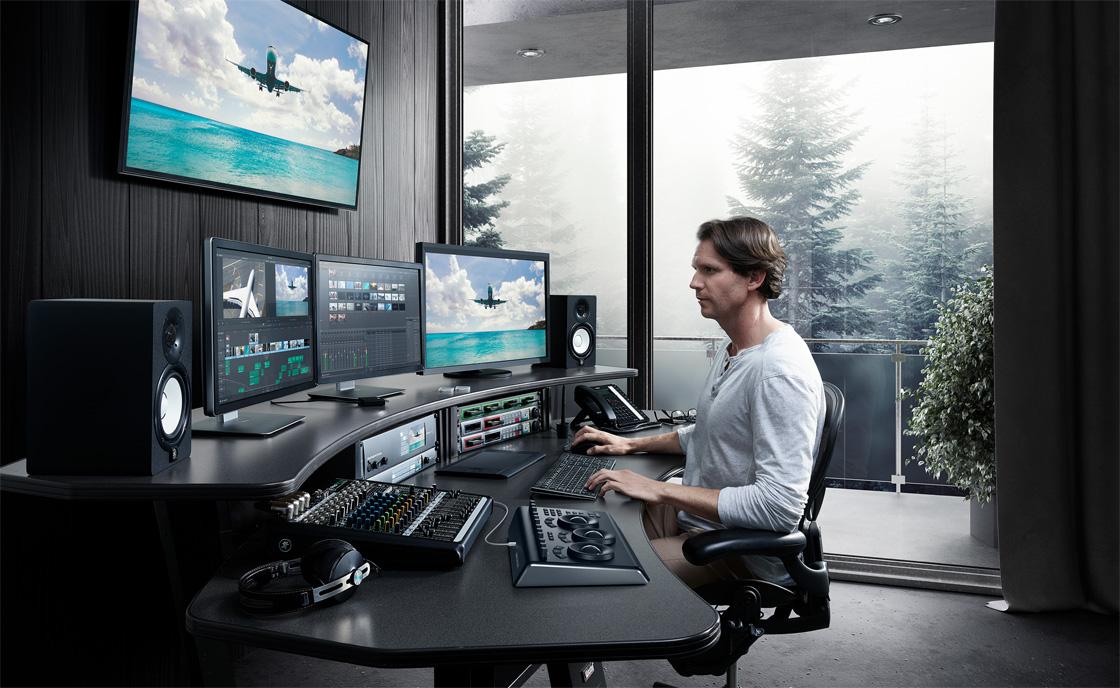
His desk is so clean, where’s all the wrappers and soda cans?
Most of the crew at Hurlbut Visuals are actually using DaVinci Resolve now to transfer footage because of the checksum verification feature. Using any checksum will take a little longer than just dragging and dropping, but it’ll take a lot less longer than having to re-shoot a scene because you had corrupt or lost files.
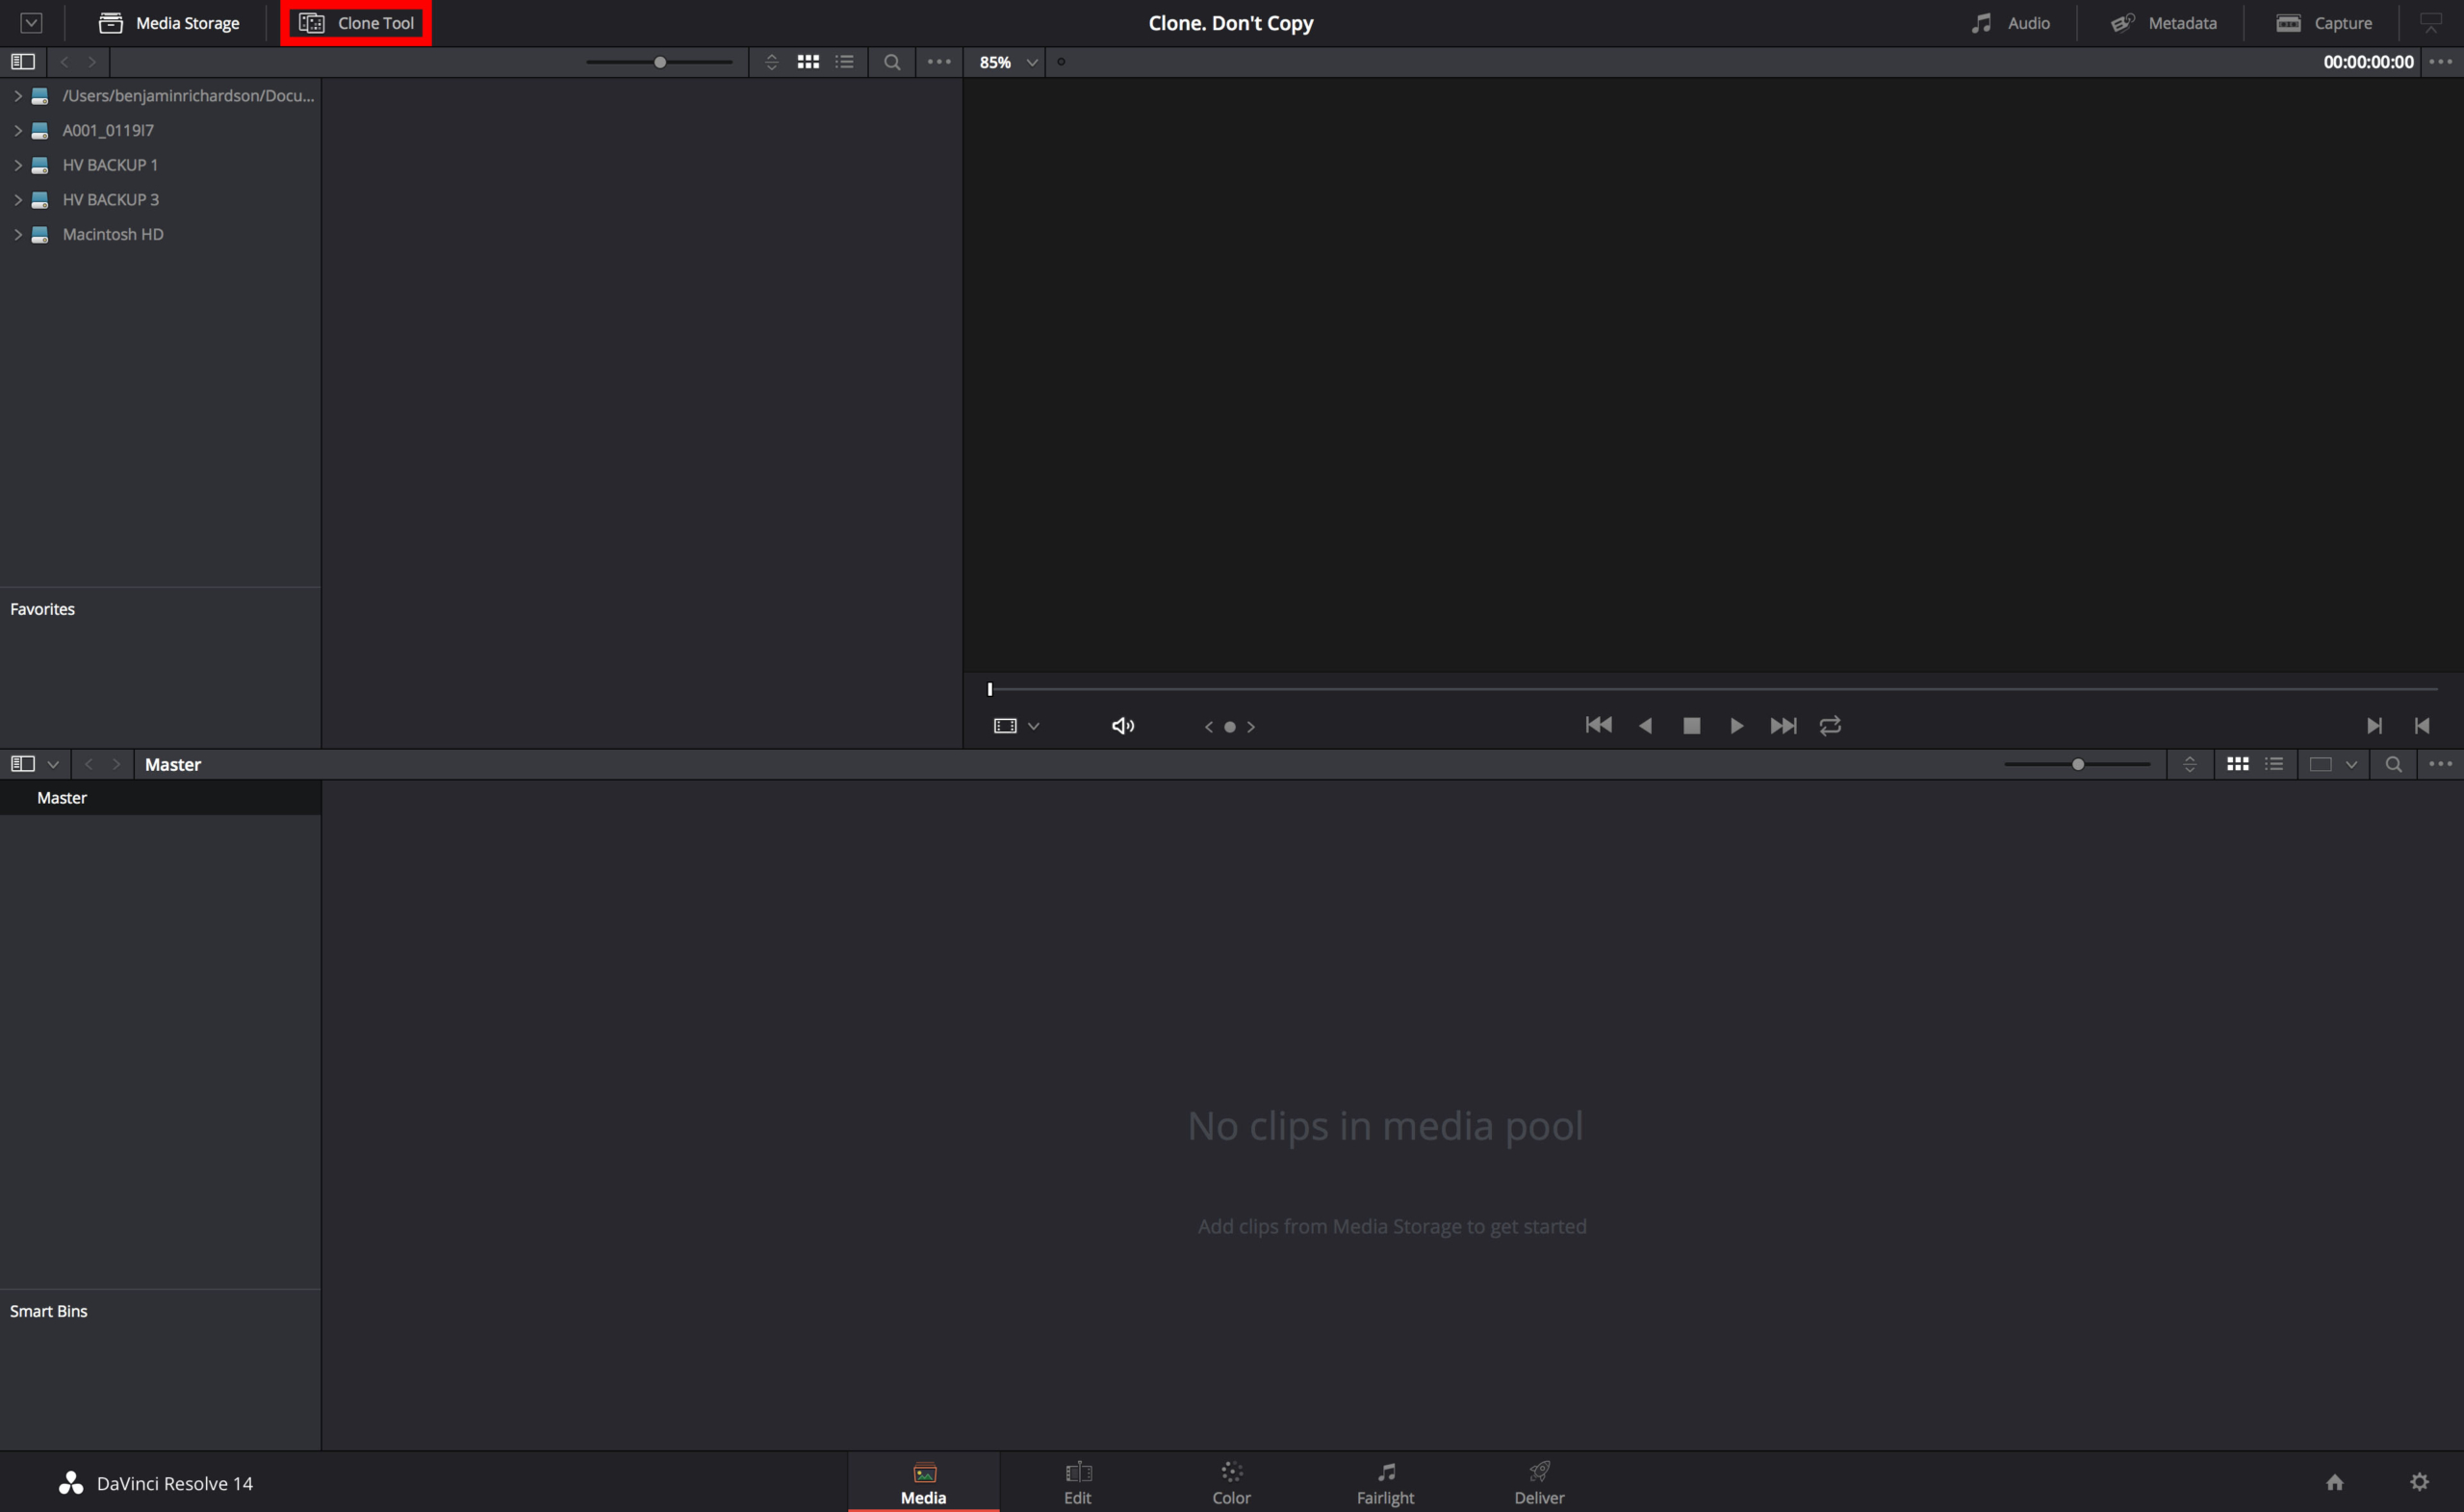
Here’s what you need to do in DaVinci Resolve:
1. In the Media tab, click the “Clone Tool” icon in the upper left of the Media Pool toolbar.
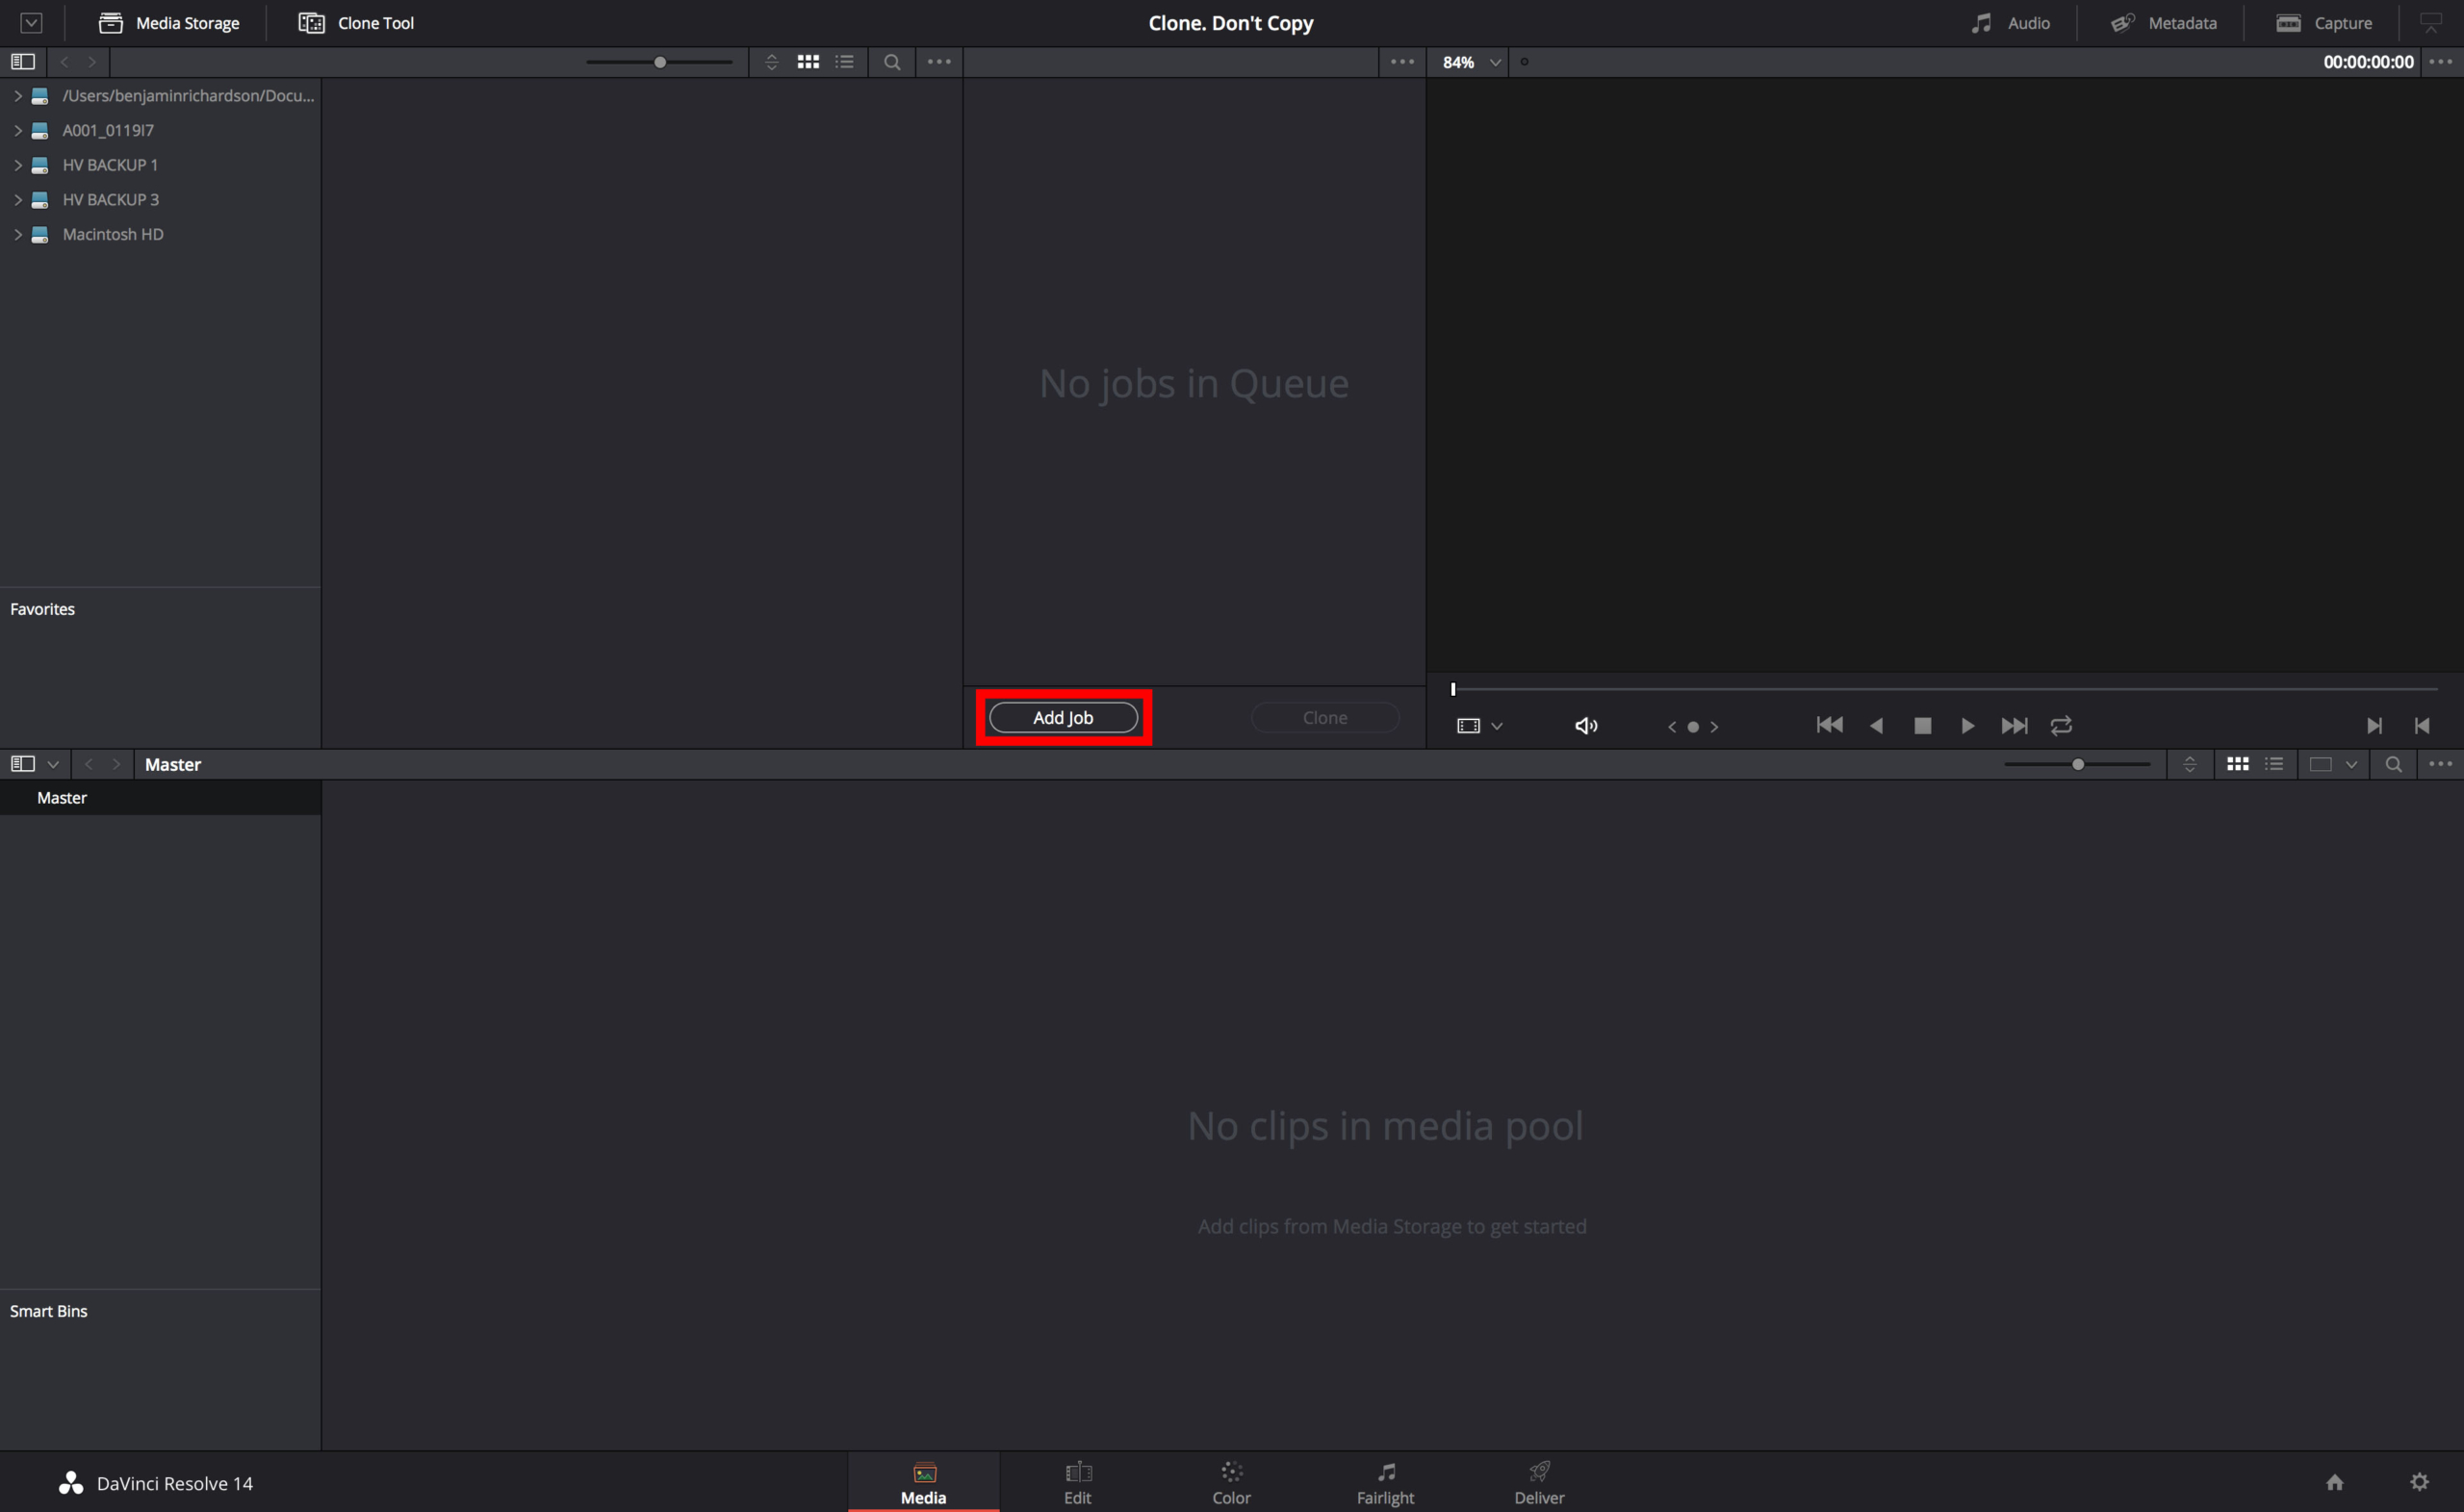
2. Inside the Clone workspace create a new job by clicking the “Add Job” button.
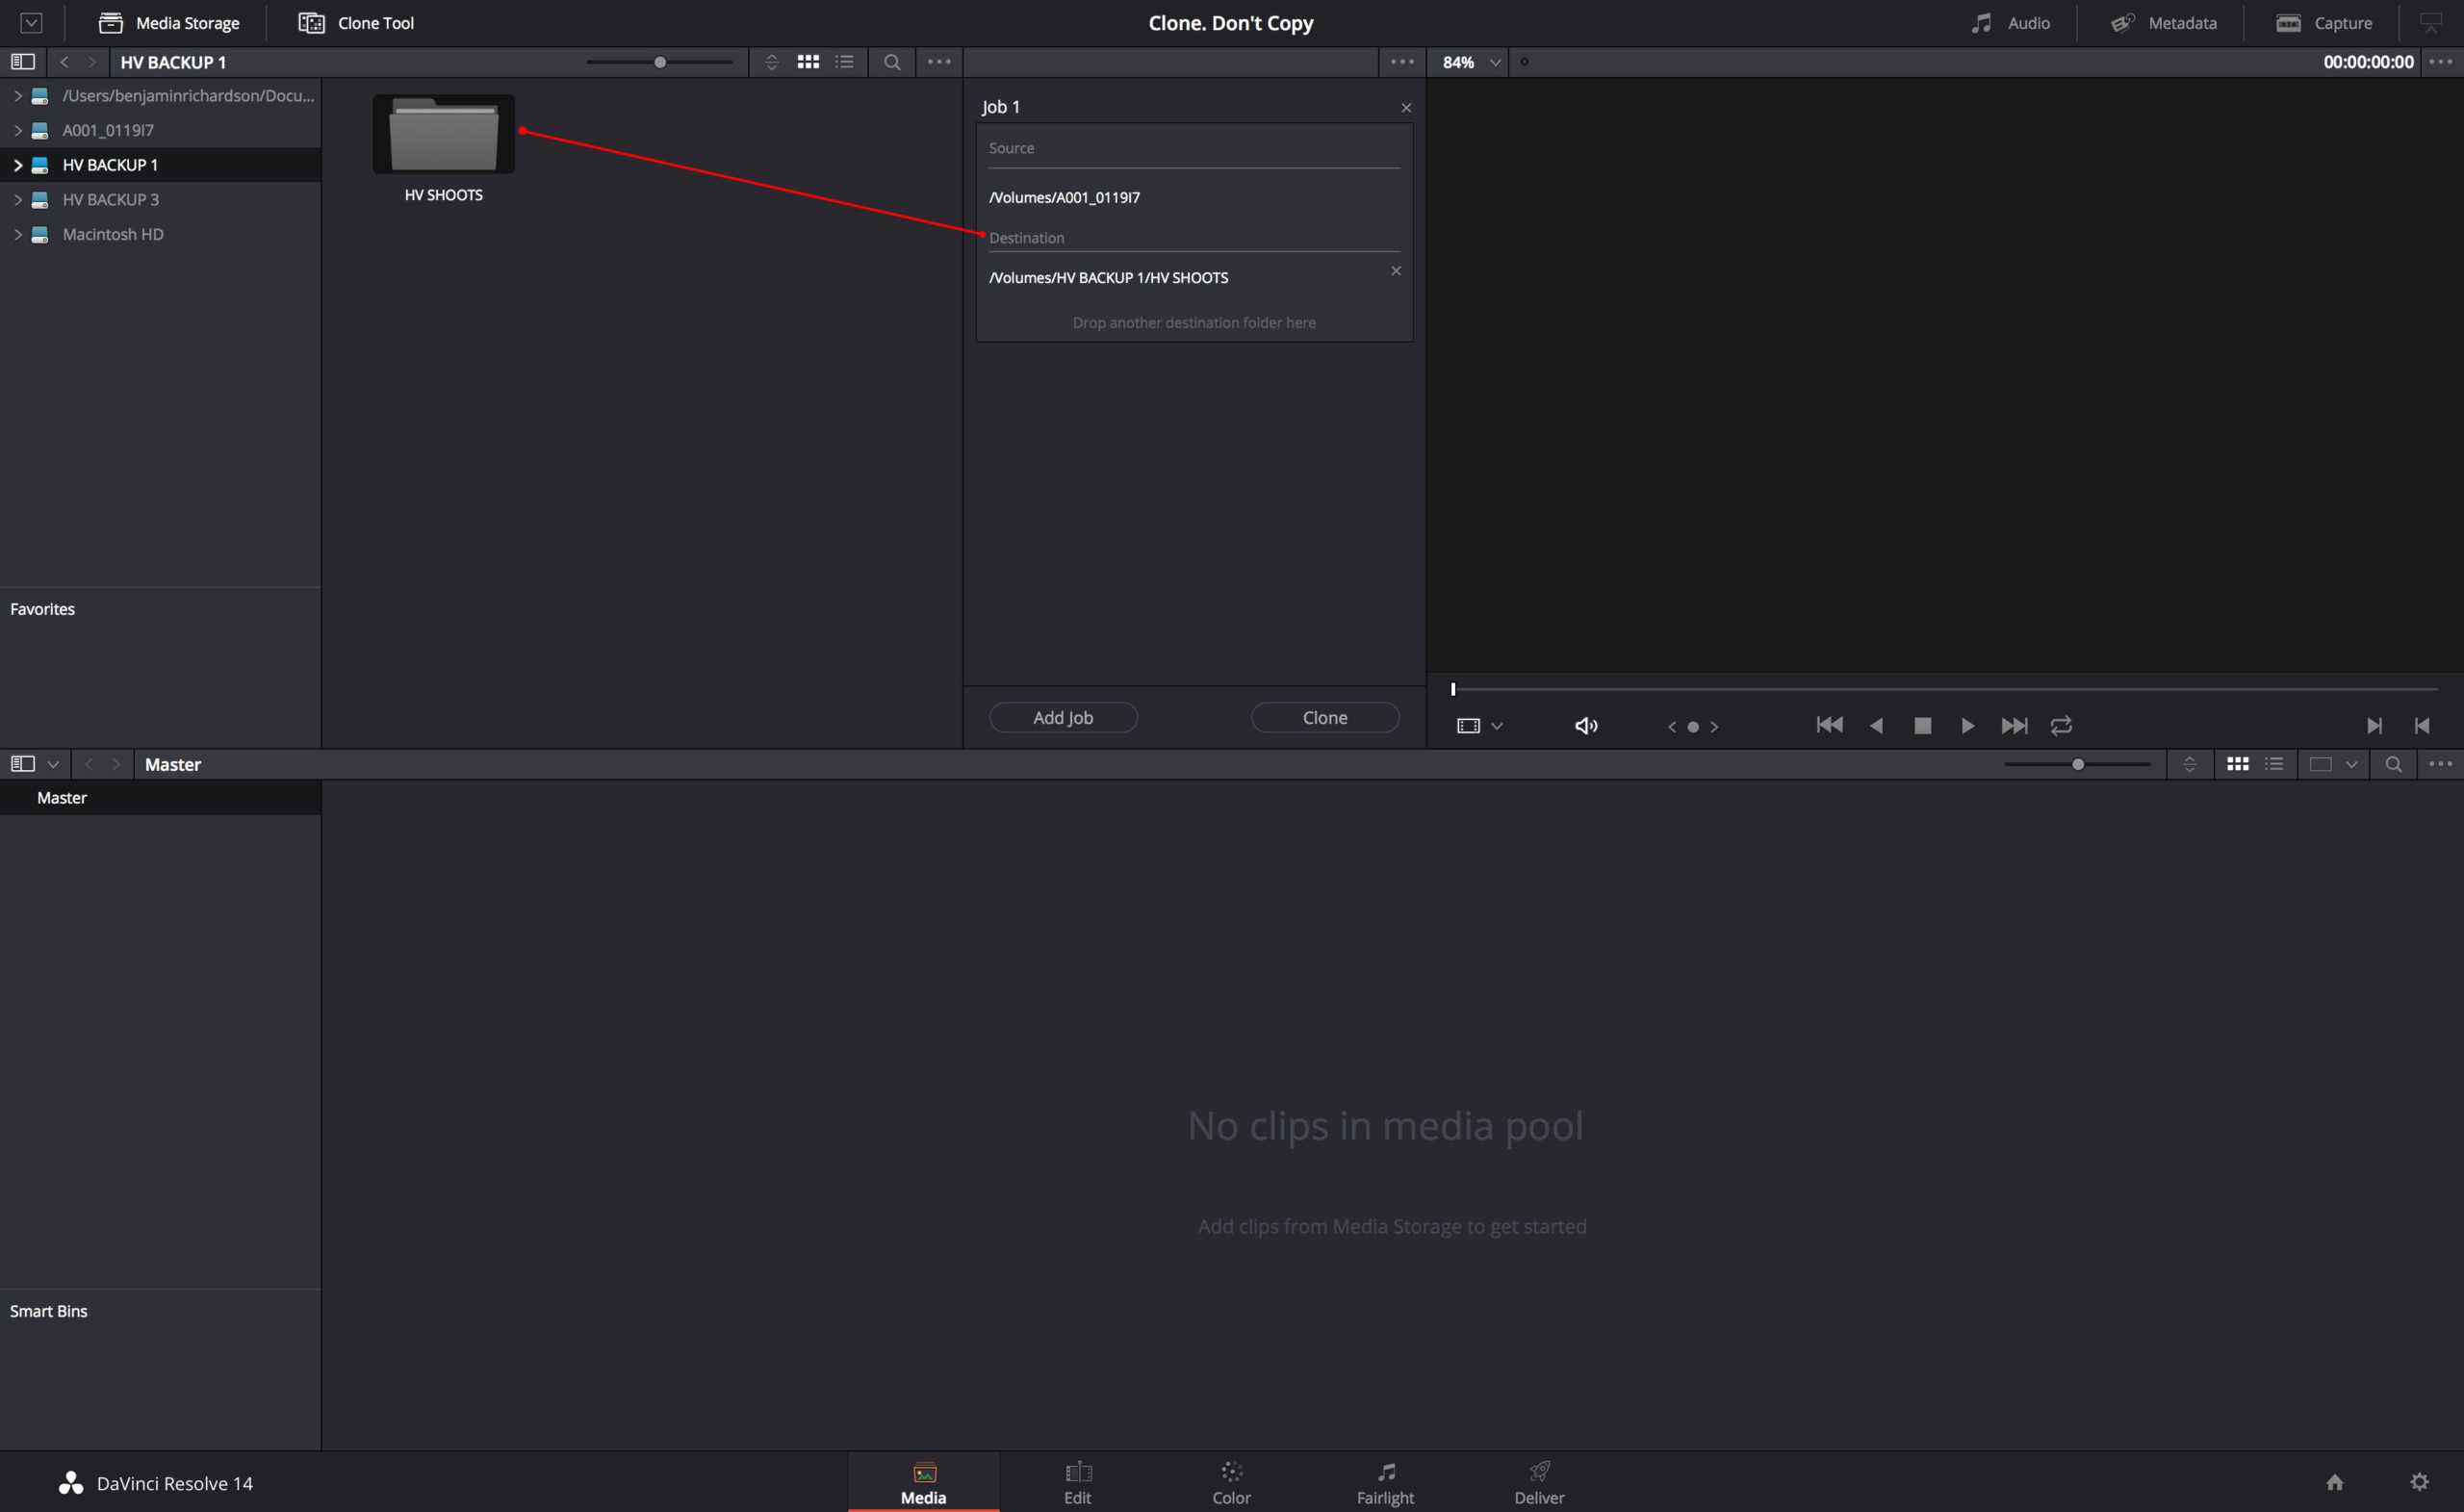
3. Drag and drop the item you want to clone onto where it says “Source”. In this case it’s a RED Mini Mag and we’ll be transferring all of it’s contents. And to be clear, setting up your transfer is the only time you should be just dragging and dropping ;-)

4. Now just open up your intended destination, and again, just drag and drop to where it says “Destination” to set your destination folder.
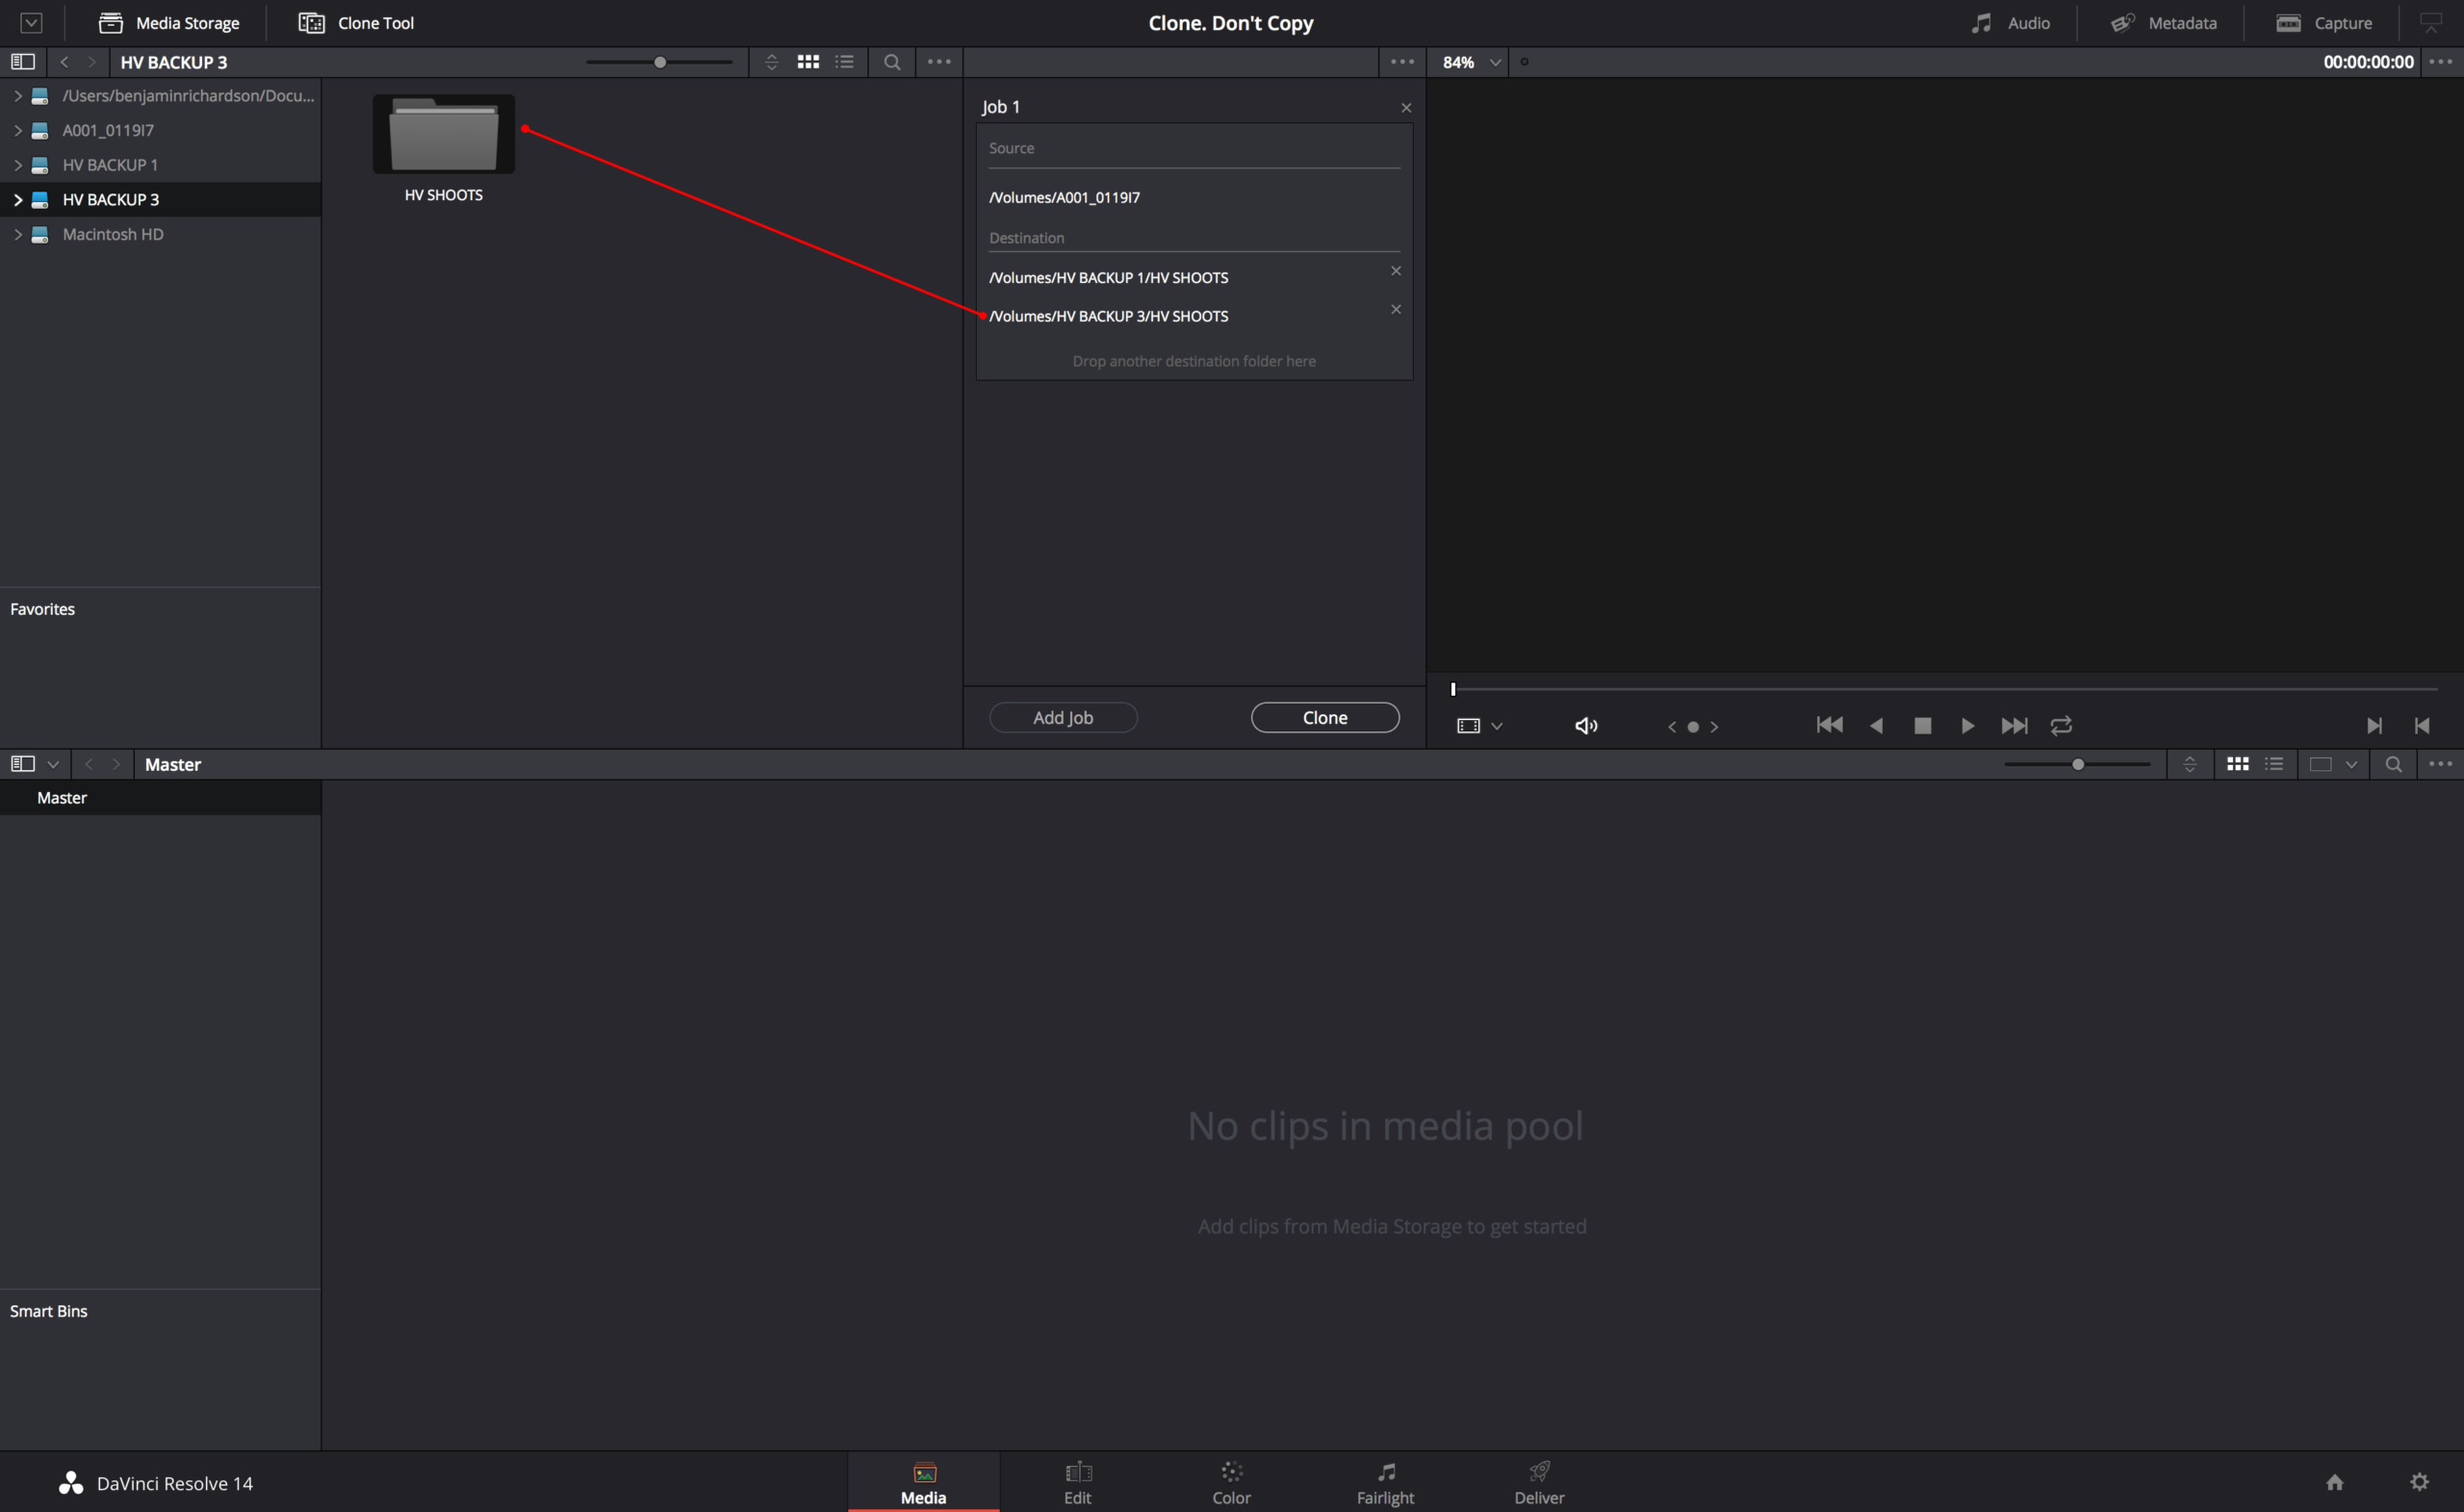
5. Repeat step 4 with at least one more separate drive.
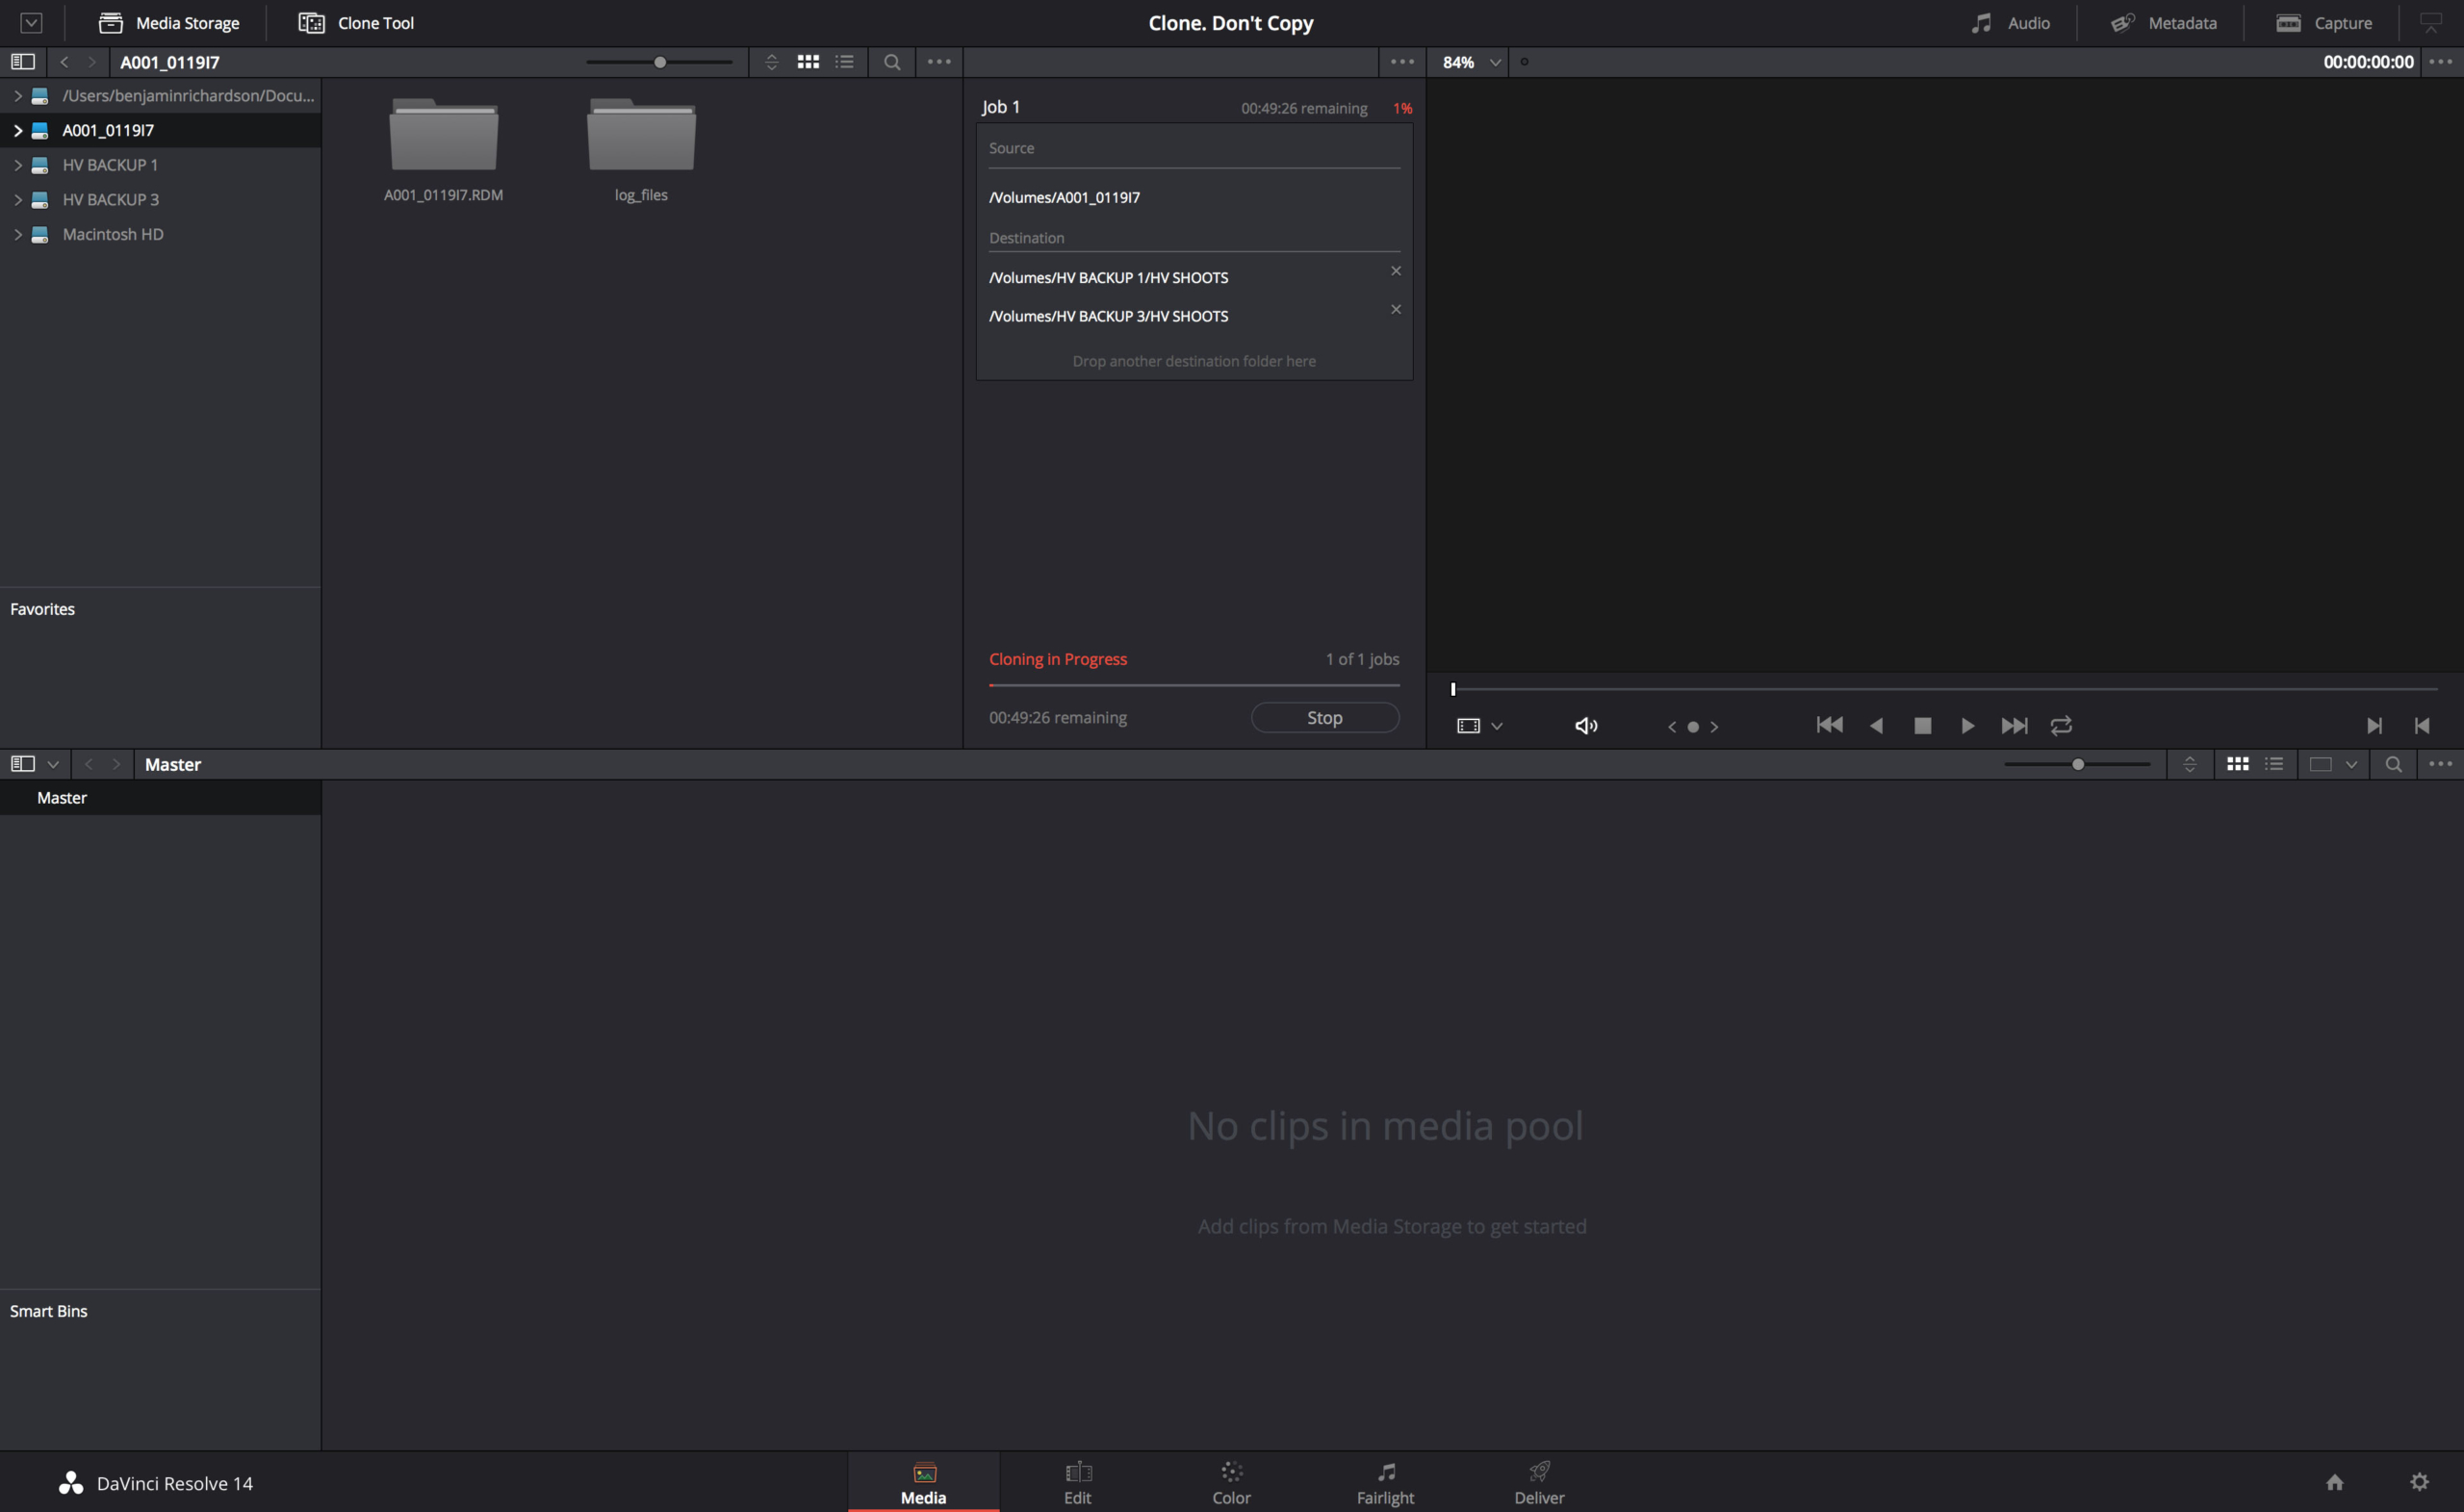
6. Click the “Clone” button.

A progress bar will giving you an estimate on how long the job will take.
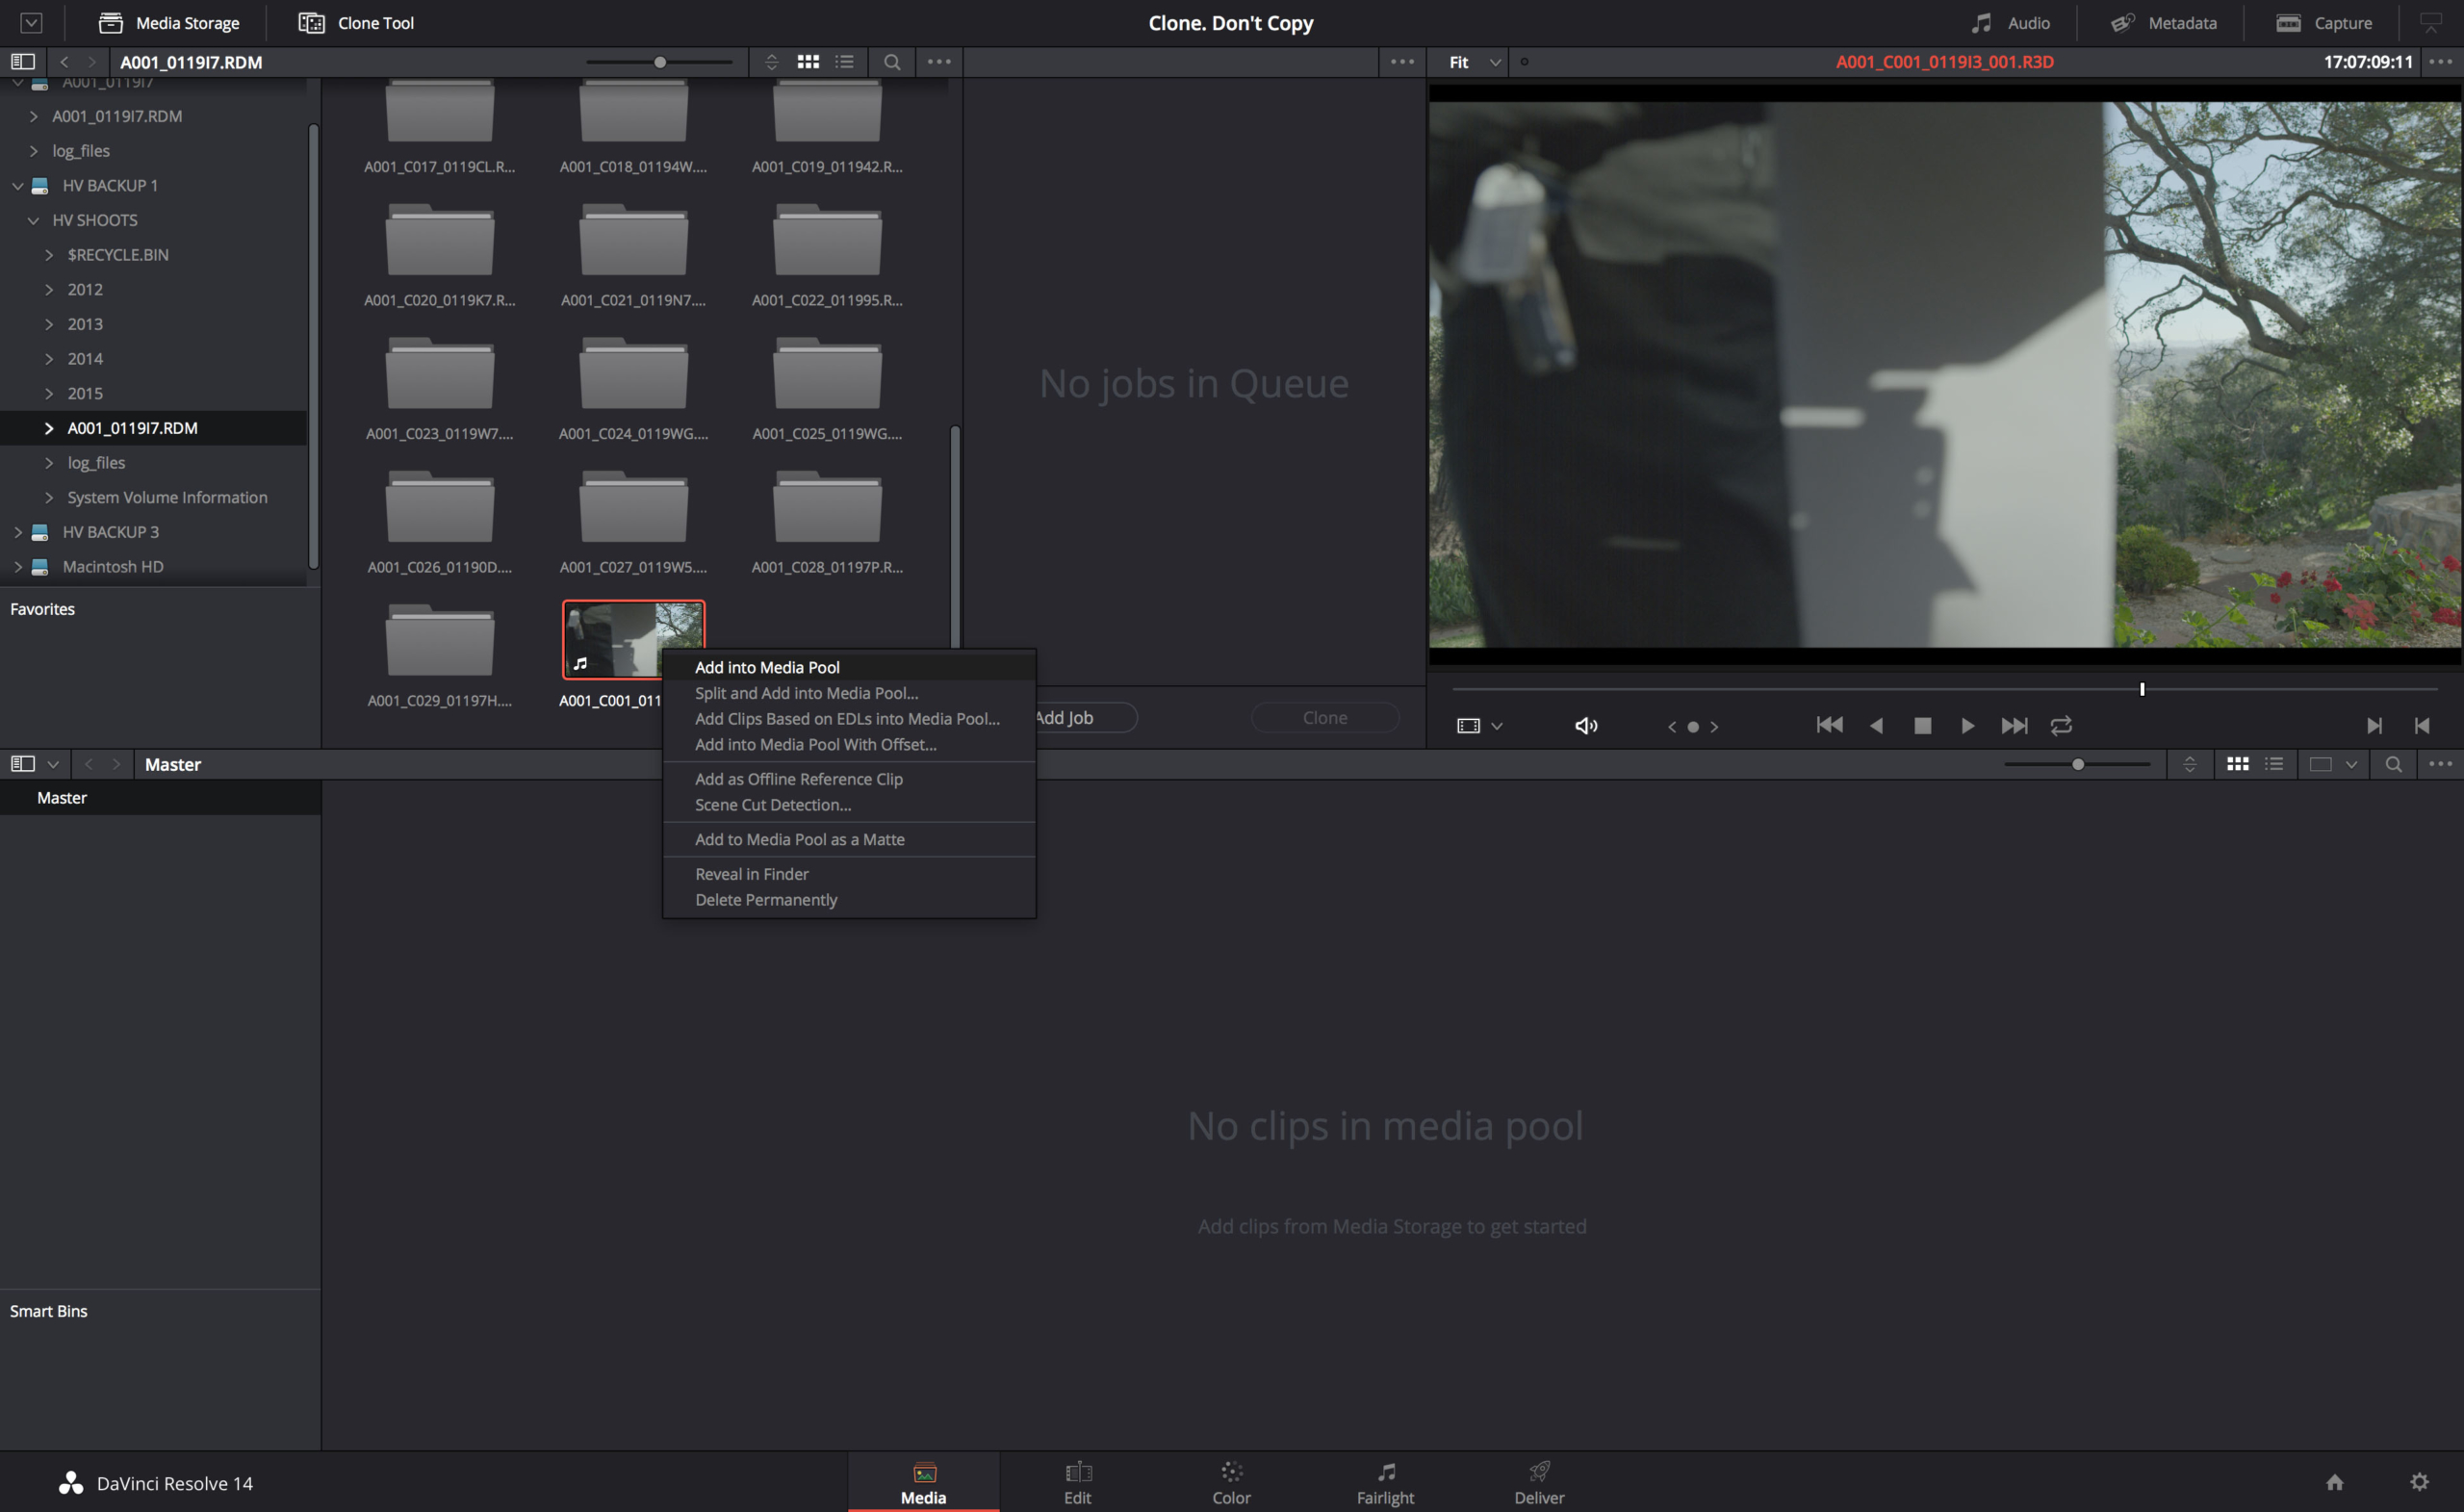
 7. Once you’ve cloned your card you need to make a visual confirmation of the footage. Right click on the cloned drive and choose “Add into Media Pool”. Clips will populate in your media pool. You’ll be able to scrub through the footage to confirm you’ve cloned the correct contents and check to make sure everything is ok.
What I really love is that all this cloning and managing of data you’re doing on set is inside the exact same app where you can edit, color, mix your sound, make your coffee, pick up your dry cleaning… alright I got a little carried away there, but you get the point, Haha!
The point being, not only do I now expect you to be backing up data correctly. But now you should be adding in mission critical metadata tags for the editors, syncing sound to footage, and burning timecode and LUTs into proxies. That way everybody’s life is that much easier later in post! Haha, I’m getting a little ahead of it, we’ll get to those lessons another time. Just stop dragging and dropping and start protecting your footage by using the DaVinci Resolve clone tool.
Here’s a few of my own LUTs for you to try out while your at it:

Or you can learn how to make your own:

If you want to get really in depth, my DIT Derek Johnson covers every aspect of being a DIT in the Camera Technician Series: The Art and Science of Being a DIT.
 |
 |
 |
 |
 |
 |
 |
 |
 |


This is honestly pretty useless, while windows/ Mac don’t checksum while copying the chances of having a bitflip is astronomically high. Software/hardware has progressed to the point where this doesebt happen that’s why we don’t bother. Dragging is 100% fine, I would recommend you drag to a mirrored drive though. This is an example of a photo person trying to write an article as a tech and failing.
Hi Matthew, I’ve never been on a professional set where drag and drop is allowed. With all that money on the line on productions, to think of anything other than checksum is ludicrous. It only takes a couple clicks to be extra sure your footage is safe.
This is a bit of a misnomer, as dragging/dropping from a card to disk is copying not moving. Once I’ve copied to disk I do all my edits backups etc, and only then would I recycle the card for another job. So if there’s any problems I still have the originals on card.
Appreciate there may be exceptional or mitigating circumstances, but probably not for your average studio.
Matthew has obviously never worked in a high-volume environment. Relying on the OS is a silly, newbie way of thinking and I wouldn’t ever want you responsible for anything crucial!
Great article, thanks!